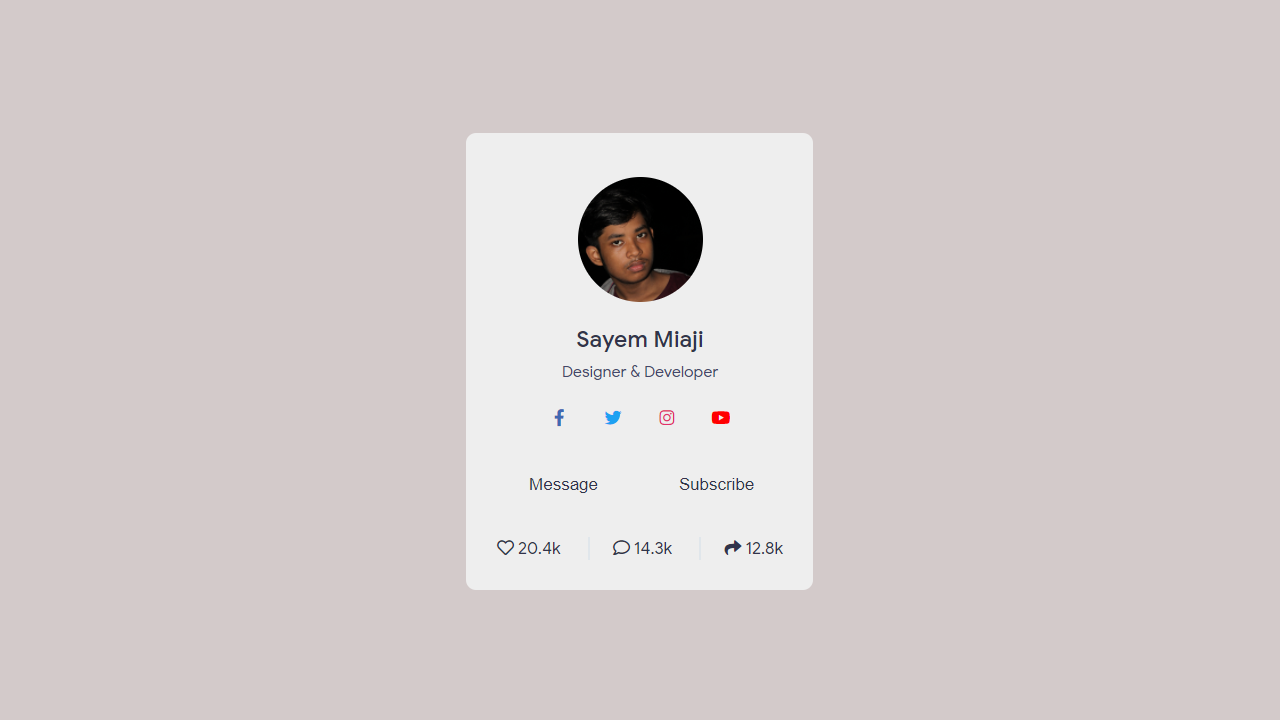
On the google blogger, we got a profile if you want to show your bio then you may add your bio and other things on the profile. In this article, I am telling you how to add and customize a professional sidebar about widget on blogger.
There is a lot of benefits you get on this widget. Let's talk about all features one by one:
- Show profile on the widget
- Show bio on the widget
- Show social media profile link on the widget
- Message and subscribe button
- Instagram like, love and share added
Login to blogger.com. Now go to the layout section then click on the "Add a Gadget" then simply take the "HTML/JavaScript" widget, now copy the below code and add it to the widget
<div class="wrapperx">
    <div class="img-area">
      <div class="inner-area">
        <img src="https://blogger.googleusercontent.com/img/b/R29vZ2xl/AVvXsEixTV5oHbfIQbTJkOoV5Ctl6UI86WwFFEHgNQJQ_-40_r83bYY8Rok2iKLqYDwMeSV6HhdYyz1pStRMYpukM2mOhzBTy22XCeNCRiFcvhp8-r2LuD101m6S0pEnH1pxvsHeS6yxtOzX1mnJ/s220/IMG_4801.png" alt="" />
      </div>
    </div>
    <div class="name">Sayem Miaji</div>
    <div class="about">Designer & Developer</div>
    <div class="social-icons">
      <a href="https://www.facebook.com/sham.malik.564" class="fb"><i class="fab fa-facebook-f"></i></a>
      <a href="http://twitter.com/" class="twitter"><i class="fab fa-twitter"></i></a>
      <a href="https://www.instagram.com//" class="insta"><i class="fab fa-instagram"></i></a>
      <a href="https://youtube.com/" class="yt"><i class="fab fa-youtube"></i></a>
    </div>
    <div class="buttons">
      <button><a href="https://www.messenger.com/t/sham.malik.564">Message</a></button>
      <button><a href="https://youtube.com/">Subscribe</a></button>
    </div>
    <div class="social-share">
      <div class="row">
        <i class="far fa-heart"></i>
        <i class="icon-2 fas fa-heart"></i>
        <span>20.4k</span>
      </div>
      <div class="row">
        <i class="far fa-comment"></i>
        <i class="icon-2 fas fa-comment"></i>
        <span>14.3k</span>
      </div>
      <div class="row">
        <i class="fas fa-share"></i>
        <span>12.8k</span>
      </div>
    </div>
  </div>
<style>
.wrapperx,
.wrapperx .img-area,
.social-icons a,
.buttons button{
      background: #eee;
}
.wrapperx{
  position: relative;
  padding: 30px;
  border-radius: 10px;
  display: flex;
  align-items: center;
  justify-content: center;
  flex-direction: column;
}
.wrapperx .icon{
  font-size: 17px;
  color: #31344b;
  position: absolute;
  cursor: pointer;
  opacity: 0.7;
  top: 15px;
  height: 35px;
  width: 35px;
  text-align: center;
  line-height: 35px;
  border-radius: 50%;
  font-size: 16px;
}
.wrapperx .icon i{
  position: relative;
  z-index: 9;
}
.wrapperx .icon.arrow{
  left: 15px;
}
.wrapperx .icon.dots{
  right: 15px;
}
.wrapperx .img-area{
  height: 150px;
  width: 150px;
  border-radius: 50%;
  display: flex;
  align-items: center;
  justify-content: center;
}
.img-area .inner-area{
  height: calc(100% - 25px);
  width: calc(100% - 25px);
  border-radius: 50%;
}
.inner-area img{
  height: 100%;
  width: 100%;
  border-radius: 50%;
  object-fit: cover;
}
.wrapperx .name{
  font-size: 23px;
  font-weight: 500;
  color: #31344b;
  margin: 10px 0 5px 0;
}
.wrapperx .about{
  color: #44476a;
  font-weight: 400;
  font-size: 16px;
}
.wrapperx .social-icons{
  margin: 15px 0 25px 0;
}
.social-icons a{
  position: relative;
  height: 40px;
  width: 40px;
  margin: 0 5px;
  display: inline-flex;
  text-decoration: none;
  border-radius: 50%;
}
.social-icons a:hover::before,
.wrapperx .icon:hover::before,
.buttons button:hover:before{
  content: "";
  position: absolute;
  top: 0;
  left: 0;
  bottom: 0;
  right: 0;
  border-radius: 50%;
  background: #ecf0f3;
  box-shadow: inset -3px -3px 7px #ffffff,
              inset 3px 3px 5px #ceced1;
}
.buttons button:hover:before{
  z-index: -1;
  border-radius: 5px;
}
.social-icons a i{
  position: relative;
  z-index: 3;
  text-align: center;
  width: 100%;
  height: 100%;
  line-height: 40px;
}
.social-icons a.fb i{
  color: #4267B2;
}
.social-icons a.twitter i{
  color: #1DA1F2;
}
.social-icons a.insta i{
  color: #E1306C;
}
.social-icons a.yt i{
  color: #ff0000;
}
.wrapperx .buttons{
  display: flex;
  width: 100%;
  justify-content: space-between;
}
.buttons button{
  position: relative;
  width: 100%;
  border: none;
  outline: none;
  padding: 12px 0;
  color: #31344b;
  font-size: 17px;
  font-weight: 400;
  border-radius: 5px;
  cursor: pointer;
  z-index: 4;
}
.buttons button:first-child{
  margin-right: 10px;
}
.buttons button:last-child{
  margin-left: 10px;
}
.wrapperx .social-share{
  display: flex;
  width: 100%;
  margin-top: 30px;
  padding: 0 5px;
  justify-content: space-between;
}
.social-share .row{
  color: #31344b;
  font-size: 17px;
  cursor: pointer;
  position: relative;
}
.social-share .row::before{
  position: absolute;
  content: "";
  height: 100%;
  width: 2px;
  background: #e0e6eb;
  margin-left: -25px;
}
.row:first-child::before{
  background: none;
}
.social-share .row i.icon-2{
  position: absolute;
  left: 0;
  top: 50%;
  color: #31344b;
  transform: translateY(-50%);
  opacity: 0;
  pointer-events: none;
  transition: all 0.3s ease;
}
.row:nth-child(1):hover i.fa-heart,
.row:nth-child(2):hover i.fa-comment{
  opacity: 1;
  pointer-events: auto;
}
.buttons button a {
    color: #31344b;
}
</style>
This a small article about how to add a professional about us sidebar widget on blogger. If you face any kind of problem with this article then feel free to tell us in the comment box. Thanks for with us.


 Posted by

comment 0 Comments
more_vert